me

me

Friday, December 21, 2012

How to Make Mince Pies for Christmas


I love Mince Pies.  Everything about those lovely little pies says Christmas to me.  I’m not fussy, I like shop bought pies, home made pies, pies deep or shallow, wrapped in all butter pastry or twisted into filo.  Hot or cold, plain or accompanied by brandy butter or cream  - yum yum yum.  I also like making them but until now have always bought the filling in jars.  This year however, I forgot to order my mince so, embracing my newly discovered have a go attitude, I decided to “have a go” at making some.  Can it be that difficult? Well, we’ll see.


This is going to take a day to make, so be prepared – you could make this today and make your pies tomorrow – just think, you will be tucking into yummy home made pies tomorrow, hot from the oven…. Ooohhhh I can’t wait!


So what do you need? 

 
Normally I don’t give measurements just incase I get into trouble with anyone, but for this I’ve looked at so many recipes that this is a fairly standard mix so I’m going to be brave and share it with you.

Sterilised Jars to hold the finished mince
Large mixing bowl
175g raisins
110g sultanas
275g currents
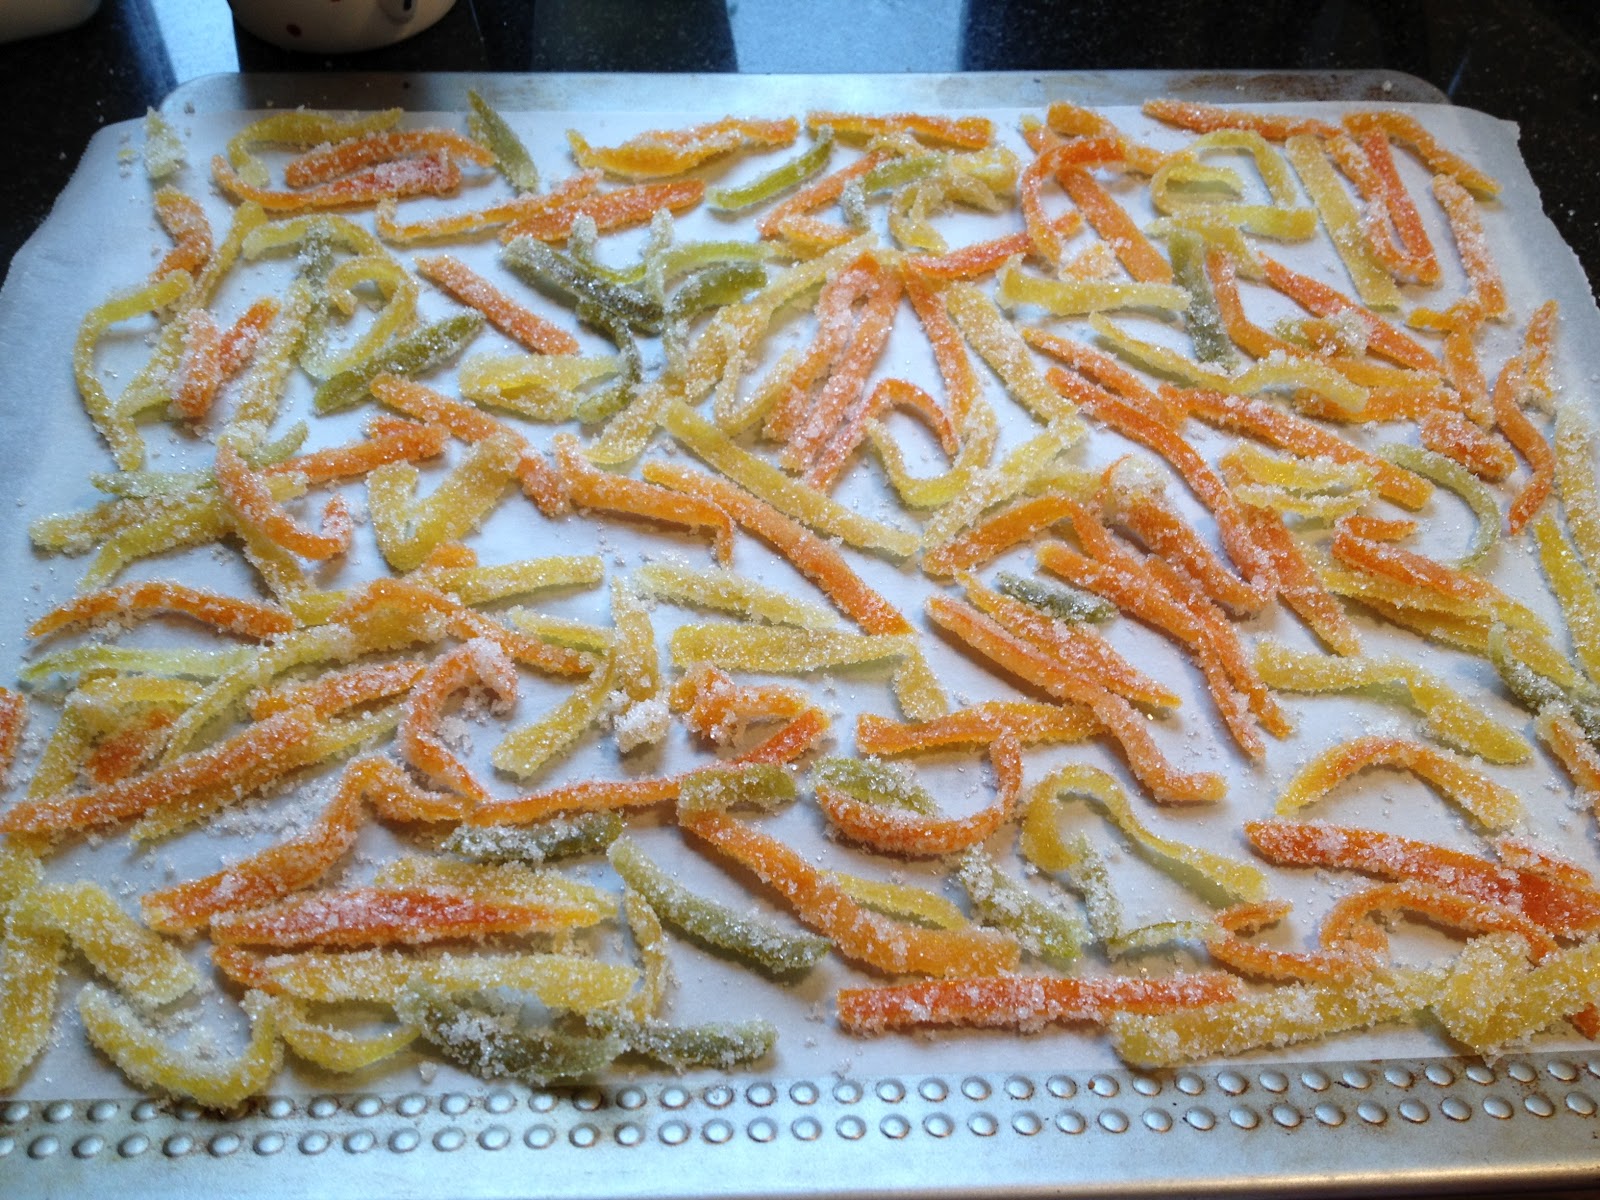
110g candied peel (you can make this!)
175g suet – either beef or vegetarian
250g Dark brown sugar
2 t/spoons of Mixed Spice
1 t/spoon of freshly grated nutmeg
1 Orange – zest and juice
1 Lemon – zest and juice
1 Apple – unpeeled but finely chopped
4 table spoons of brandy.

 Okay, what to do.

 
Put all the ingredients EXCEPT the brandy into a large bowl and give it a really good mix.  Cover the bowl with a clean tea towel and leave over night.

In the morning, give it a good stir, cover with foil and place in a cool oven 110C/gas mark ¼ or 225F for 2 ½ hours. 
The suet will have melted but don’t worry it is supposed to and that is what helps it keep better once in the jars.

Remove from the oven, stir well and leave to go cold stirring occasionally. It looks a bit oily to begin with, but as you stir and it cools it begins to thicken and darken.
When the mix is cold add the Brandy and stir well.
Fill your pre-sterilised jars and store in a dark place for up to a year – or make lots of mince pies and eat before Christmas!

 
Well, that was easy!
 

Now for the pies…..

 
I’ve made a simple short crust pastry because I think it’s the nicest and I like a little traditional.  So for all you novice pie makers, here’s my pastry recipe.
250g plain flour
120g butter cold and cubed
1 pinch of salt.
Ice cold water.
If you want, you can use ½ butter and ½ trex (or other vegetable fat) and if you fancy something a little more zingy, try using the juice of an orange to bind the pastry – it is lovely with mince pies.  Today, Im keeping it simple and using cold water.
Place all the flour, butter and salt in a bowl and rub together until it resembles breadcrumbs.  The secret to great pastry is not “over working it” and not letting it get too warm so the butter is melted before it goes into the oven.  So you can either do it by hand or by food processor.  I use my hands as firstly, I don’t have a food processor, and also I’ve got poor circulation so my hands are cold most of the time which is not great, but fantastic for making pastry.  If you have normal circulation then you can wash your hands with cold water before you start rubbing in the butter and you get the same results.
 
When you have got your breadcrumb results then bring the crumbs together by using the cold water.  Add a tablespoon at a time.  When you have brought it together, give it a little kneed and wrap in cling film and put in the fridge for 20 mins.  This allows the butter to harden again.  (I don’t do this)  I can’t be bothered waiting and I figure, hey I’ve got cold hands so the butter isn't that soft and I need pies quickly!!!!
Roll your pastry out till its quite thin and cut out 12 circular disks.  I use a shallow tart dish, rather than the deep muffin dishes.  Pop the disks in the tray, fill with a teaspoon of your mince and top with a star shaped disk.  You can brush with egg wash if you want, I don’t as I dust with icing sugar afterwards and I prefer the look of unwashed pies.


Bake for 10 – 15 mins in a hot oven 220c /gas mark 7.  Keep your eye on them – you want them a light golden colour with a bubbling mince.  If the mince spills out – don’t worry, Rustic is very fashionable and the icing sugar covers a multitude of sins.  Take them out of your tray, let them cool if possible and eat with cream, brandy butter, family, friends and love.
 
Enjoy – these lasted about ½ an hour - and not one soggy bottome in site, Mary Berry would be so proud of me.

Monday, November 5, 2012

Old Fashioned Seed Cake

Hello everyone – hope you’re all making lots of candied peel.  I figured it was time Charlie and I actually used ours and made the Old Fashioned Seed Cake.

The by line in the Baking Bible says that you will either “Love or Loathe seed cake” I wonder which it will be for us – I hope its Love as Charlotte is becoming a little disillusioned with both her efforts and the actual taste of the cakes – I think the Lemon Yoghurt Cake scared us both.   I’ve decided that baking every recipe is a really interesting way of using a cookbook as normally I wouldn’t try “seed cake” as without a colour picture to tempt me, I would probably skip to, what I think, would be a more appealing bake.  This way, you have to try what you normally wouldn’t – an opportunity to try new things, if you will.

 Charlie washed up and put on her apron – I actually must get round to washing that as its covered with debris from previous efforts.  So, I’m sitting with a coffee and the good book, plus Downton Abby is playing its Sunday afternoon repeat, its fair to say, I’m a little distracted.  Must try and concentrate!

Everything except the candied peel and seeds are mixed together, then carefully you fold in the peel and half of the seeds.  The seeds in this recipe are caraway seeds, so it has a slight Indian smell – nice.  Pour everything into the deep 7cm round tin, sprinkle with remaining seeds and bake for approx 1 hour at 180C/160C fan/Gas 4.

This cake smelt fantastic and we were very hopeful.  I was a little worried that I’d left it in too long, but when it was cut it was perfect and the taste…..fab!
This is lovely, not too sweet, but buttery – perfect with a cup of tea.

 The best bit, was the candied peel – much much much nicer than shop bought and I am now a complete convert to making my own.

A number of people have asked me why I don’t put the recipe on my blog for each cake – the honest answer is I don’t know if Im allowed to as this might be in breach of copy right – If anyone knows the answer please let me know as I would love to share them.

Monday, September 24, 2012

When Charlie met Mary........

The excitement in the Allen household has built almost to fever pitch, finally, it’s the weekend for the 1st ever Cake and Bake Show at Earls Court in London.  Charlotte is just about beside herself and I’m stressing – I’ve got to get us there and back, on my own, without loosing her.  I know this sounds ridiculous as I am a grown up, and so far I’ve managed to cope with most things in my life so a short trip to London with an 11 year old who, I might add, probably could manage the trip on her own, should be a piece of cake (pardon the pun). We will get the train up to Schiphol for our early morning flight. Oh, no trains that early!  Okay not a problem, I’ll drive up.  Oh, the A2 is closed in places on Saturday morning.  Is someone trying to tell me something??  I’ll leave very very early!

 We’ve arrived!!! Hoorah, but it does look like half of London are here with us – wow what queues.  The staff moved everyone inside very quickly and up the escalators we went. What an amazing sight.  Bakers young and old, little and large, new and experienced everywhere –  Hmmmm what do you call a group of bakers? A Batch? A Batter? A Cream?  I don’t know, think I will Google it – be right back……….. According to www.myuniversalfacts.com the collective noun for a group of Bakers is a Tabernacle of Bakers.  I think I prefer a Batch of Bakers. 

Catherine and Sarah Jane
 Earls Court is massive, and everywhere is packed, but we picked up the programme and planned our route – so much to see in the Market place and so much to taste, this really is my kind of show.  We made our way past the Cake Kitchen and found ourselves at the Kids kitchen and they were about to begin a bread making and shaping workshop, so Charlie joined in and took another little girl under her wing.  While I was taking photos of Charlie I spotted a couple of familiar faces – Sarah-Jane and Catherine from this years Great British Bake Off.  They were just lovely and were happy to smile for a photo – apparently they are doing a demo this evening.  Sorry to say, they didn’t give anything away about who won – Im glad really as I’m loving watching them both.

the Lovely Paul Hollywood
 When Charlie finished her course, we wandered on only to “bump” into Paul Hollywood who was being rushed off to present in the Bread Kitchen.  I asked him for a photo, but he was really busy – then he stopped and said “of course, no problem” Thank you Mr Hollywood you are a true gentleman – you made Charlie smile and I will never believe anything negative written or said about you – I know just how lovely you are.  You were also pretty fantastic in the demo and had everyone laughing.

 We picked up our copies of the Telegraph so we have our lovely pink bags and popped into Pretty Witty Cakes and picked up their pink bags too. I had a lovely chat with the chap who runs some of the courses and he told me about courses available not only in the South of England but also in Altrincham, Cheshire.  Also, if you cannot get to a course, they have just launched on line courses - so you can learn how to make some of their fantastic creations from where ever you are in the world – I love their fairies and will probably be joining them for a course very soon. Check them out www.prettywittycakes.com


Patrick Ryan making bread
 Did I mention the queues?  OMG – massive massive massive.  Luckily there were enough toilets, but there weren’t enough places to get a drink.  I think there were four vendors – really not enough.  We stood in a line waiting to get a cup of tea for over an hour! It was our only gripe; we couldn’t even buy a bottle of water without standing in one of the never-ending lines.  I think vending machines with bottles of water would have been a great idea.  After all the yummie munching we indulged in, we really needed a drink!  Tomorrow we’re bringing water and sandwiches – top tip for next time bring your own just incase!


Juliet Sear
Mary Berry wasn’t at the show on Saturday, but will be there on Sunday and is conducting a book signing so before we left for the day we picked up her new book, Mary Berry’s Complete Cookbook.  I don’t want them to run out!  Charlie also picked up a copy of Juliet Sear’s The Cake Decorating Bible, which Juliet signed for her and obviously had a little photo.

The really nice Ed Kimber


Day 2 at the show began very wet, again massive queues but apparently they are going to have more refreshments stalls so at least we will be able to get a drink easier today.  We dashed in and went straight to the book-signing stall.  Mary is signing her new book at 11:45 and at 10:40 people have already started lining up.  I’ve got two books I would like signing so I lined up and Charlie went to watch Ed Kimber, who won the original Great British Bake Off, in the Bread Kitchen next door who was “really really good” Unfortunately Ed’s book was sold out so we were unable to get that one.  Charlie was able to have a photo taken with Ed, who was also “really really nice mummy”

 Mary was escorted to the book-signing table surrounded by what looked like baking security – bouncers with aprons!  She is tiny.  I wonder what she makes of all this fame and the level of interest in her – I’m sure she is quite bemused by the whole thing.  We are shuffled to the front of the line and Charlie slips round the back to have her photo taken – she signs the books and we’re gone! There was not time to say anything and I think she probably was slightly dazzled by all the photo snappers – I know I was.  I’m not sure how I feel, a little sad to be honest, but I have a photo of Charlie and Mary and she is happy, so that’s enough plus we have two signed books.
The wonderful Mary Berry herself

Baking Mad sponsored part of the Show and of course Eric Lanlard was on hand running demos and classes, which were sold out.  Boy that Boy works hard! For two days he didn’t stop – if he wasn’t in a demo, he was teaching and always with a smile.  I think there is something very special about baking – it makes you happy and if you are lucky enough to have a job that makes you this happy, you make others happy.  Eric is obviously very happy plus I could listen to him all day – unfortunately, I have an 11 year old to which a sexy French accent is totally wasted on so I’m moved along.

The Market place was truly an Aladdin’s cave of goodies – everything you could imagine for the keen armature baker.  Tins, cases, moulds, colours, sugars, flours, sprinkles and edibles.  We only had hand luggage, so weren’t able to buy too much, but I was able to pick up some great cutters, cases, a lovely mould and a great silicone Macaroon sheet.  Nothing else could possibly fit in our little case, never the less, we are delighted with our fabulous purchases.  Do you know what was missing? Branded merchandise! I would of loved an Apron or Tea Towel or Tote bag with the Bake Show logo on it or Storage tins or T-shirts or Recipe folders – you know the type of things – I think they really missed a trick, I might mention it on their Facebook page.
 
Anyway, we had a wonderful time and arrived home safe and sound on Sunday night much to the relief of my hubbie who’s only worry was that I would either loose or forget Charlotte somewhere.   If you’re interested in going to the next show its  April 5th –7th 2013 in Manchester. Yippie!  We can go Home for the weekend and next time I can take the car and “load up”

Some useful links you might be interested in:

www.thegreatbritishbakeoff.co.uk
www.paulhollywood.com
www.maryberry.co.uk
www.theboywhobakes.co.uk


Happy Baking everyone x
 

Thursday, September 13, 2012

Add 50grams of Mixed Peel………

Mixed Peel or Candied Peel is a lovely ingredient.  It adds a tangy flavour to many recipes and is delicious in Hot Cross Buns, Christmas Cakes and Minced Pies.  It is also a key ingredient in many of the fruitcake or spiced cake recipes within the Baking Bible.

Within the UK, mixed peel or candied peel is readily available in all supermarkets within the baking section.  It comes in little pots, all chopped up and ready, just pop the lid and you’re good to go.  So it will come as no surprise that when Charlie and I read the recipe for our next cake “Old Fashioned Seed Cake” it required mixed peel. “No problem” I said, “I will pick some up this week and on Sunday we can bake”.  I spent a very long week checking out various supermarkets in the Eindhoven area looking for Mixed Peel or something similar…….Nothing, Narda, Zilch!!!  

It’s too late to order on line, and I can’t find it anywhere… I know we’ll make some!! It can’t be too difficult… can it? I’ve got an Orange, Lemon and a Lime so we can rustle up some on Sunday morning and then we can bake on Sunday afternoon. Perfect.  I searched on line and it didn’t look too complicated, just a little time consuming so I thought I would share with you how you do it, just in case, like me you need Mixed Peel and you too live in a Peel free zone.


How to Make Mixed Peel or Candied Peel.


Basically it’s really simple you need 8.5 floz of water and 128g of sugar per Orange.

Depending on the size of your lemons – I had large lemons so I counted them as an Orange, but small Lemons count it as ½ an Orange and a lime as ½ an Orange.

Put the water on to boil and dissolve the sugar into the water and bring it to the boil for 5 mins.  While this is happening, remove the peel from your fruit and remove all the pith.  Slice the peel into strips.

 
Add the peel to the boiling sugar water and bring back to the boil, reduce and simmer for between 1 ½ - 2 hours or until the water is just covering the peel and reduced to a quarter of its original quantity.

 Keep an eye on your peel, after an hour mine was nearly ready, but having never done this before, I continued cooking as the recipe said about 2 hours – boy was that a mistake!  The sugar caramelised, burnt then crystallised and it then it turned into a big pan of burnt blaaaaaa!!!!!!!!!!!

"Oh Mummy!!!! Why did you leave it that long? Why didn’t you take it off? Have you got anymore Oranges/Lemons/Limes???” and worst of all “ Does that mean we can’t bake today? (sob)”   Baking the Seed Cake has to wait for another time as No, I don’t have any more Oranges/Lemons/Limes and, just for the record,  I don’t know why I didn’t take it off the heat before it burnt on the bottom of the pan.  I hung my head in shame - I've let her down again.

2 Days later I tried again.  I decided that I would have a go without Charlie’s little eyes watching my every move.  The whole of the next chapter in the Bible is about fruit and spiced cakes so we are going to need this peel and there is nothing worse than failing in your 11 year olds eyes.  Sheesh, talk about pressure!

So, second attempt…

Everything the same up to the point of the bubbling sugar at the hour point.  This time the peel looked different, I think its because I had managed to get just about all the pith off the peel so it was much softer.  It was ready after 1 hour 25 mins.  I took it off the heat to cool.  When it was cold, I drained it in the colander and let it dry a little.


Once the peel has dried a little you dip it in sugar and place it on lined baking sheet.  At this point you can either place it in a very low oven for 1 hour or, if you are a complete chicken like me, simply leave it to air dry over night.  Can you imagine if I had got to this point and then burnt it in the oven – blimey! it doesn’t bare thinking about!
 
Anyway, the following day it was nicely dry and still lovely coloured so I snipped it into smaller pieces and placed it into a zip lock bag.  This will now keep for up to 3 months in the bag. This is really easy to make once you get past the burning sugar stage, it just takes a careful eye and some time.  Have a go!

See you on Sunday its Old Fashioned Seed Cake........with Mixed Peel!

Saturday, September 1, 2012

Lemon Yoghurt Cake

Back to school and back to routine. After what can only be described as a totally amazing summer holiday, we are all feeling a little jaded. Our holiday was a whirl wind camping trip in a mobile home round Brighton, Little Hampton, Isle of Wight and London - oh and did I mentioned we went to the Olympics too?

As I said, totally amazing and one, which I doubt, I will ever forget.

Baking over the summer has not exactly been our top priority and as we have only been at home for 2.5 weeks, we didn't actually have much time. Now, its 1st September 2012, the girls have been back at school for 2 weeks, and Georgia has gone off to play golf with her daddy so Charlotte is looking for something to do. We have already settled into the Great British Bake Off series 3 so she's flipping thru the Baking Bible feeling all inspired again.... now where were we up to??? Oh yes Lemon Yoghurt Cake....

 Yoghurt in a cake? Mmmmm ….. Yuk! I know I’ve never tried it, so I shouldn’t turn up my nose, but I’ve got to be honest, I don’t fancy this at all – plus Phil, my hubbie has done exactly the same so we are not convinced this is going to be good.  Anyway, we’ll give it a go.

 
This cake is made by firstly separating 3 eggs and whisking the whites into soft peaks – great in a kitchen aid, still I made Charlie do the test by turning the bowl over her head to see if they were whisked enough – I would love to say it fell out on her head, purely for comic effect, but unfortunately it was whisked enough and stayed in the bowl.  The butter, sugar and egg yokes are creamed together before adding the Greek Yoghurt and lemon zest and mixing well.  The flour is folded in; the egg whites are then very carefully folded into the mix.  There is quite a lot of mix, so it goes into a deep, 8-inch tin and put in the oven for between 1 – 11/4 hours.
 

Im expecting that this isn’t going to take that long with our oven so we started checking at 50 mins.  Wasn’t ready!  Charlie checked and then slammed the oven door!!!!! Oh pants! The whole thing collapsed  – There’s our lesson for the day, don’t slam an oven door when there is a cake baking.  So, when it was baked, we turned it out - it looked a little flat and weighed a ton.   When the cake is cool, its iced with lemon juice and icing sugar which is left to set. The good book says that this cake is best stored in the fridge and eaten within a week.  This made me laugh, as I don’t believe any cake would last that long in our house.

 
Looking at our cake, its not the best looking cake that we have produced but we’re sure it will taste better than it looks…do you know what, it didn’t!  Whether it was the door slamming, the yoghurt, or if it was actually under baked I don’t know, but something caused it to be very heavy.  What ever it was, it was horrible.  Guess what, it didn’t make it into the fridge – it want straight down the waste disposal – next week its Old Fashioned Seed Cake – oh I hope that’s better.

Sunday, June 3, 2012

Battenburg Cake

It’s been a long time since I had battenburg cake.  I have this vague memory of an over sweet cake and dry marzipan – something old ladies like and I’m sure I can hear someone saying “oooh nice slice of battenburg dear?” at a village fair or something similar.  It certainly doesn’t bring back fond memories I’ve got to be honest.  It also looks a bit complicated and I’m not sure that I’m up for complicated today.  Feeling slightly grouchy and not really in the mood for baking – but its Sunday and I’ve got Charlotte primed and ready to go.  There is a lovely picture in the book, so here goes nothing.


We don’t have a Battenburg tin– I know what you’re thinking, we don’t actually have very many tins but a Battenburg tin is quite special and has movable sides so that you can make perfectly sized cake.  Anyway, needless to say, we don’t have one of those but with a little bit of amateur origami we should be able to use our 7inch square tin.  It actually took me 3 attempts and 20 min to perfect a paper divided tin but I was quite pleased with the result.  In the meantime, Charlotte was busy mixing up the sponge   mixture.  “Mummy what’s ground rice?!” What? What!! Oh no! We don’t have any of that – right a quick look on the Internet to find out what else we can use.  Apparently you can substitute either Semolina or ground almonds for ground rice, but if you choose ground almonds then you cake can be a little dry.  Luckily enough, I do have some semolina so we used that instead.


Half the mix is spooned into one side of the tin, then you add the red food colouring to the remaining mixture and put that into the other side.  Now, there didn’t seem to be very much mixture on either side but we decided that it would be okay and anyway, we don’t want it to raise too high as we are going to be building it up afterwards.  35 to 40 mins it said to cook for, but as usual we were ready early.


Marzipan or Almond Paste?

 When the cake is cooled, you have to trim it and make a checkerboard pattern sticking it together with melted apricot jam.  You then wrap it in Marzipan or Almond Paste and Bobs your Uncle, you’re done…mmm not that easy.  If anyone is making this recipe my only piece of advice is – buy Marzipan.  We didn’t but luckily, Mary gives an easy recipe for easy Almond paste in the back of the Baking Bible so we decided that was what we were going to make.


Really easy – it’s just ground almonds, caster sugar, powdered sugar, eggs and almond essence.  You mix it together, give it a little kneed and than wrap it in cling film and bob it into the fridge until you need it. Easy Right?

Ours didn’t look quite right – it was very sticky but we guessed that after some chilling in the fridge it would be fine so we left it in the fridge for an hour while the cake baked and cooled.  It still didn’t seem firm enough but we decided to give it a try.


I rolled the paste out and we placed the jam-coated cake onto it.  Unfortunately, the paste wouldn’t roll around the cake – instead it stuck fast to the counter top and refused to budge.  After 10 mins of trying to lift the paste and a lot of growling and grumbling and a couple of choice expressions, we decided that this paste wasn’t going anywhere except down the waste disposal.  Time to start again, but with a little less liquid in the paste.  So that’s what we did – however, whilst lifting the cake off the original paste, it broke – oh flipping flip!   The second attempt was much better and not as sticky, but to be safe I rolled it out between sheets of baking paper.  The cake was brushed with jam again, sticking the broken bits together, and placed on the paste.  Using the paper, I rolled it over and covered the cake in the paste.  Yeah! It worked!! Well nearly – I didn’t actually roll it out enough and underneath the marzipan doesn’t quite join, but you can't see that can you?


Taste?  Was quite nice with a cup of tea watching the Diamond Jubilee Thames Pageant.


Roll on next week, its Lemon Yoghurt Cake
 – must remember to buy Greek Yoghurt!

Wednesday, May 23, 2012

3 for the price of 1


It's been a little while, so I apologise firstly if you have stopped by, only to find that nothing has been added. Well just like waiting an age for a bus, then 3 come along at once - here are 3 cakes in 1!

Coffee and Walnut Cake


It's safe to say we don't like coffee cake in this house so Charlotte and I approached this cake with very little enthusiasm. Oh well, Harry will like it I'm sure. So off we go. Kitchen aid is prepped (Charlie is now a confident Kitchen Aid user) it was either share it with her or my Kitchen would of had two before very long - she had already started saving her pocket money and even I couldn't take the shame of having to admit to the fact my poor daughter had to save her own pocket money because her mummy was too mean to share a food mixer! Sad, but true


The good book calls for 2 x 7 inch sandwich tins - I don't have those, but I'm sure 8-inch tins will be fine. I have to be honest Charlie was not convinced but I persuade her it would be okay and she sets about creaming butter and sugar. The recipe says put everything in at once but we've discovered that if you use a food mixer you can over mix the flour which gives rubbish cakes - so this is my first hot tip - if you use a food mixer, ALWAYS cream the butter and sugar until very pale and light then add the eggs in one by one. Whisk the mix until really light and almost mousie, then add the flour on a low speed but only mix together till just mixed.  I don’t care what the recipe says, trust me this works and you then don’t over beat the flour.  They come out really light and as long as you don't leave your cake too long in the oven, they will be moist and yummy.


A very poor effort
Anyway back to our cake - I left it in the oven too long, so it was a bit "well done" around the edges. Charlie was totally unimpressed. I think it was due to the fact she had made the coffee butter cream whilst holding her nose and gagging at the smell only to find that due to the tins being too big, the cake was thin and crispy - whist great on a pizza, not so great on a cake. She decorated the cake and we appraised our effort - rubbish! We couldn't possibly give it away - poor Harry might crack his teeth so Charlie, being the brave trooper that she is, said she would try it - apparently, as far a crispy cakes go, it tasted pretty foul too.  Needless to say, down the waste disposal it went - sorry Harry, but I'm sure the next coffee cake will be better. 

So what did we learn from this?  If you don’t have the right sized tin – it does make a difference so you will either have to adjust your cooking time or your ingredient quantities – in Mary’s book, she gives quantity adjustments for different sized tins in the Victoria Sandwich recipe – use them it really really does matter.


Harry has a Request…


Whilst Charlie and I were ruining a perfectly good Coffee and Walnut cake, Harry popped round.  His 7th Grandchild was having his 1st Birthday and could Charlotte make him a cake for the party.  There would be all the grandchildren, their parents and of course Harry and his wife Rikki – Charlotte was delighted to accept the order and she wandered off to my cookbook shelf. 

 I like most women, have a multitude of cookbooks, which I have rarely opened let alone used.  One book I have is a Debbie Brown’s 50 Easy Party Cakes.  This is a great book for the armature cake decorator – perfect for Charlie and me.  Charlie flicked thru the book and found the “little blue train” this should be ideal.  Firstly it’s a blue train, which is great for a little boy and also its covered in liquorice All Sorts. If you have ever met a Dutchie, you’ll know they absolutely love liquorice.  It’s called “Drop” and comes either sweet or salty and the local supermarkets have every type you could imagine.  All Sorts are called “Engelse Drop” so we know we can get them.  All we need to do is bake a cake, cover it in fondant and stick the sweets on… easy right?


We made a simple vanilla sponge and baked it in a square tin (7in) and when it was baked and cooled we cut it in half.  The first half was then cut into three to form the 3 carriages and the second half was cut into two, one slightly larger than the other which will form the engine.  Everything was covered in butter cream and we set about kneading the fondant.  Fondant needs to be kneaded to make it soft and pliable if you don’t knead it enough, it will crack and give you a terrible finish.  Turns out Charlie is a natural Fondant kneader!  It was lovely and warm and easy to work with.  So we covered the engine and the carriages – this is a first for us so if I’m making it sound easy, it wasn’t! It was the blind leading the blind but the book gives really clear instructions so we were still confident.  It was my job to cover the engine and carriages, which was quite tricky.  It just didn’t seem to stick and wouldn’t go smooth even with a smoother.  Then the butter cream kept coming out of the bottom….Ace of Cakes or Cake Boss doesn’t have this problem!  I think this is the problem with watching too many cake programmes – they make it look so simple and it really isn’t.  I guess this is because they are trained and qualified and we are just having a go.  

Anyway I managed to cover the train in blue and Charlotte set about sticking on the All Sorts over the carriages along with the liquorice wheels with Sugar Glue.  The wheels kept falling off! So we resorted to butter cream to stick the jellies on the wheels and the wheels on the cake.  Luckily it worked, and didn’t look too bad – not quite as neat as the book, but we’re happy.  The carriages however are a work of art thanks to Charlie – she did a great job and they made the train look amazing. 


When we finished we assessed our work – not quite as good as the one in the book, but we were very proud – wonder what Harry will think?


Harry and Rikki were delighted – they had never seen a cake like this before and it was not what they were expecting.  The party was the following day and Charlie and I kept our fingers crossed that the wheels didn’t fall off before the cake got to the party – we shouldn’t of worried, the following day we received an email with lots of photos of a very happy little boy and really positive comments that they all loved the cake and especially the “drop”.


We really enjoyed making the cake, but I don’t think that we’ll do another.  I have a lovely friend who makes this sort of celebration cake and I have a re-newed admiration for her skill and patience – there is a link to her blog from here its Baking for Shoes – check her out – she has make some fantastic cakes.


Cappuccino Cake


Oh no another Coffee Cake. 

I think the reason we haven’t been that busy in the baking department is that there have been too many coffee cakes for our liking.  Oh joy, another one.


There’s a lovely picture in the book for this one so we know what we should be making.  The ask for 2 x 8inch tins – great, we’ve got those.  This is basically a very rich chocolate cake with a coffee whipped cream filling and topping.  So I sit down with a cup of coffee and read out the quantities while Charlotte is busily weighing out and whisking away.  The cocoa powder is mixed with hot water to form a paste and the butter and sugar are creamed into that.  Charlotte creamed them all until the colour went quite pale and then added the eggs one at a time.  All the dry ingredients were then added and it was poured into the tins and baked.


The best bit
Charlie then tootled off and watched the football with her daddy while I watched the cake – after the last time, I’m feeling a little under pressure not to leave it in too long.  My oven is, I think, 20 degrees hotter than it says, and cooks 5 –7 mins quicker than the recipe says.  Now this isn’t a problem once you have worked it out as you can make allowances for it, but I’ve had the oven for 5 years and its only since Charlie and I have been baking that I have noticed it.  So if you are having problems with your cakes, it might be worth either turning down your oven or buying an oven thermometer to check what the temperature actually is in there.  Ooohh I think that was another hot tip! (Pardon the pun)


The cake was ready 7 mins early! But wasn’t over cooked at all thank goodness – I really can’t take the look of disappointment on Charlottes face when I let her down. 


When the cake was cool enough, Charlotte whipped up half a pint of whipping cream with some coffee essence (very little) and spread it between and on top of the cake.  We sprinkled it with cocoa and assessed our cake.  It looked lovely, wonder what it tastes like?  Should we give it to Harry or try it ourselves?  Sorry Harry – there’s chocolate in that cake, we’re trying it!  Oh my goodness! It was fantastic.  If you are not sure about Coffee cake, this is the one to try.  The Chocolate cake is very light and moist but tastes really Chocolaty because of the coffee and because we didn’t add too much coffee to the cream it has only a hint of coffee – everyone loved it in our house – poor Harry didn’t get a look in, but another time I’m sure it will find its way to him.


Next time its Battenburg cake – I definitely don’t have a tin for that!